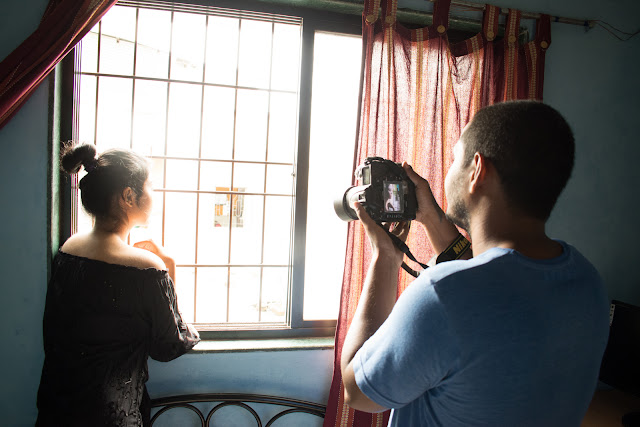
As you saw in my previous post, I shared some tips on how you can shoot outdoors using natural light, If you haven't yet, you can view the post here.
As you know it gets hard these days to step out in the rain and try to shoot, not only will you risk your camera getting wet in the rain, chances are you wont be able to get the desired shot you are looking for.
So today I will share a few tips on how you can use the Natural light coming through your window to its full advantage to make some beautiful and creative portraits using Window Light.
 |
| Using Window Light for Portraits. |
The below mentioned tips aren't just limited to shooting portraits, you can use these tips for shooting Food, Products and use it with your own creative ideas to get some out of the box shots.
So let get started with it.
1. Timing
Timing is the key to shoot using Window light. as you all know, natural light coming through the window wont be there through out the day. It will, but the intensity of it would changes, Hence figure out the timing when the light is not to harsh, not to low or which time of the day the light gives you the best effect which you need to shoot with.
2. Choosing the Right Window.
Now that you know that timing is a key for this kind of shots, choosing the right window also matters.
For example, If you plan on shooting using the Window which is located to the EAST side, at around 7:00 AM to 10:00 AM, changes are will get direct bright Sun Light coming through which will be too harsh, unless blocked or diffused using a curtain. The same way if you choose the window which is located on the WEST side, at around 4:00 PM to 6:00 PM would also give you harsh light.
It completely depends on what kind of a shot you are looking for, Do you need a soft and settled look or else do you need a hard contrast and dramatic look. its not a hard rule as such to choose so and so window for the same.
I mostly use the Window on the North side at my place, which offers me good side light through out the day and if I need to work with some harsh light I usually shoot using the window on the WEST side post 3:30 PM.
 |
| Photographed by : Vinod Yadav |
3.Camera Gears and Setting.
When it comes to shooting Portraits, I Love shooting it on my 50mm. want to know Why and more about the Nifty Fifty, check out my post here.
 |
| Charles Joseph using a 50mm lens. Photographed by : Vinod Yadav |
Don't have a 50mm lens, no worries you can always try experimenting with different focal lengths.
Shoot in Manual (M) mode, as it will allow you to have full control over your camera. choose the Metering mode as per your style and environment of shooting. Most of the time I use Spot metering for my shots when I'm shooting portraits.
[You can also use Aperture Priority Mode (A/Av) too for these shots]
If your camera supports a Live View function, you can use it to frame your shot and see how the final image would look like in real time. (I would personally recommend you not to use it, as it will make you lazy).
 |
| Photographed by : Vinod Yadav |
4. Other equipment.
A Tripod can be very useful for such types of shots, If you have one, don't be lazy to use one.
 |
| Photographed by : Vinod Yadav |
Reflectors, they can always work wonders on any kind of shoot. You can use it to fill light, Block light, Diffuse light, and create dramatic effect too.
 |
| Photographed by : Vinod Yadav |
5. Background
Always make sure what you have in the background. shooting a portrait on a 50mm, allows me to blur the background if there is nothing much of a interest. I use the black side of my reflector as a background to get a low key lighting effect for few of my shots.
You can use the Window as a background too for some dramatic and story telling shots.
I often use it to give a High Fashion Glow effect to my images when I use the window and its light as a back light to my model while shooting.
 |
| Photographed by : Vinod Yadav |
I also use it to make my images a silhouette to create some dramatic shots.
 |
| Photographed by : Vinod Yadav |
you can view the final edited images out of this shoot below.
 |
| Shot at 50mm with ISO 400, 1/30sec at f/2.8 |
 |
| Shot at 50mm with ISO 200, 1/125sec at f/2 |
 |
| Shot at 50mm with ISO 200, 1/320sec at f/1.8 |
 |
| Shot at 50mm with ISO 200, 1/400sec at f/1.8 |
 |
| Shot at 50mm with ISO 200, 1/125sec at f/6.3 |
 |
| Shot at 50mm with ISO 200, 1/125sec at f/6.3 |
 |
| Shot at 50mm with ISO 200, 1/40sec at f/2.8 |
 |
| Shot at 50mm with ISO 200, 1/40sec at f/2.8 |
 |
| Shot at 50mm with ISO 200, 1/40sec at f/2.8 |
 |
| Shot at 50mm with ISO 200, 1/40sec at f/2.8 |
 |
| Shot at 50mm with ISO 200, 1/40sec at f/2.8 |
Stay connected with me for more such Tips and How-To's on Photography. I will be coming up with a How to shoot using natural light Indoors in my future post.
Until then, Take Care and Keep Shooting.
Model : Aditi Sapate
BTS & Assisted by: Vinod Yadav
Comments
Post a Comment